Things to Consider When Installing a Ball Screw
These are general guidelines; each machine must be considered as a specific case.
1. Dismantle machine covers and clean thoroughly.
2. Check before replacing the ball screw:
- That the lubrication has been working.
- That the ball screw is not dirty.
- That the ball screw protection is intact.
- That ball screw/bearing units are aligned.
- That the ball nut and bearing assembly are tightened.
- That there is no play in the ball nut or bearing assembly.
(Sometimes replacing only the bearings is sufficient.)
3. Keep the new ball screw in its packaging until installation is to begin.
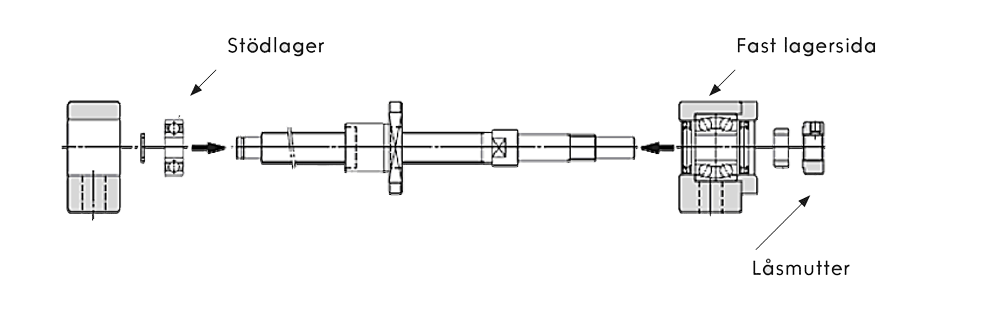
4. Install and center the bearing on the fixed side.
5. Always replace bearings when replacing the ball screw.
6. Tighten the bearing locknut to the specified torque.
7. Install the support bearing on the screw and insert it into the bearing housing.
8. Ensure no dirt gets on the ball screw.
9. Insert the ball nut into the housing and tighten the screws loosely by hand.
10. Secure the bearing on the fixed side (usually the drive side).
11. Move the table back and forth; position it as close to the fixed bearing side as possible.
12. Then tighten the locknut.
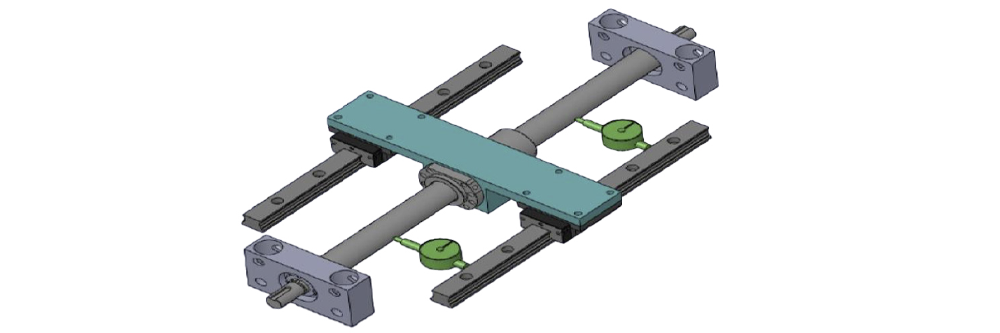
13. Move the table back and forth and correct any misalignment.
14. Then tighten the support bearing.
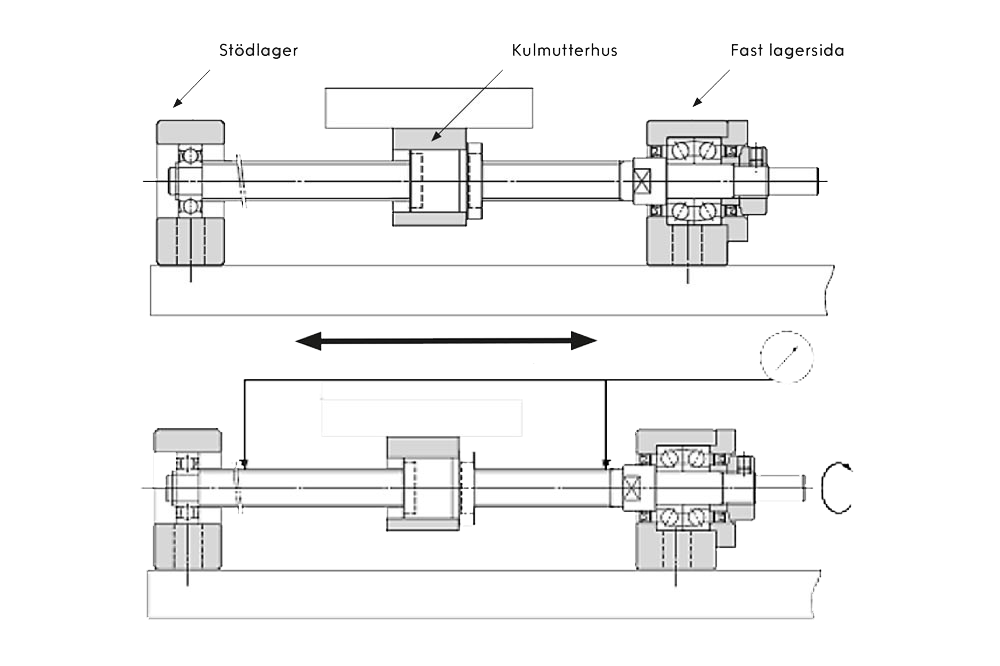
15. Check alignment.
NOTE!
Maximum deviation between linear guide and ball screw: 0.01 mm.
16. When everything is okay, check that all screws on the bearings and ball nut are tightened.
17. Ensure lubrication is supplied to the ball screw/nut.
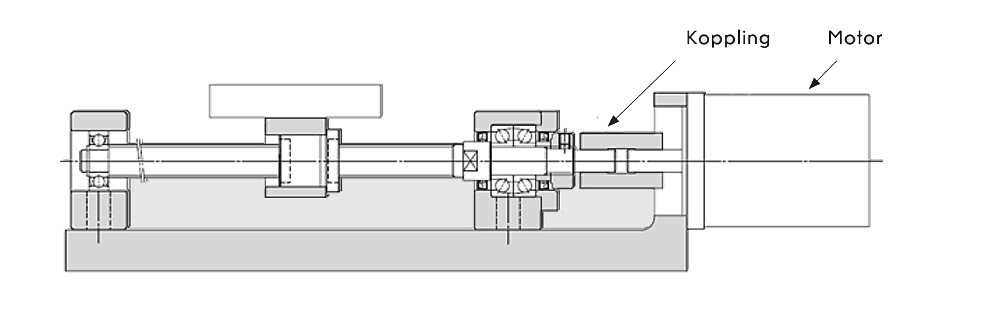
18. Then mount the motor with a coupling.